Friday 28 November 2008

Matcha & Adzuki

I have a can of adzuki red bean paste sitting in my cupboard for quite sometime, I couldn't even remember when I have bought it. It was hidden underneath a pile of baking ingredients that I have accumulated over the past few months or even close to a year! Fortunately, it has not gone past the expiry date, and I took it out to make a Matcha & Red Bean Butter Cake almost right away.


The cake was made by 'customising' this same recipe for a low fat orange yogurt cake, simply by replacing the orange flavours with matcha powder and some red bean paste. Instead of using a loaf pan, I baked the cake in an 8" round pan. Although it had a big crack across the surface, it was a nicely domed cake. I took the sweet aroma of this matcha cake baking in the oven as a sign of guarantee that it would turn out lovely ;)


Just like bananas & chocolates or hazelnuts & chocolates...I would also consider matcha & adzuki red beans: a match from haven. The cake was wonderfully moist and the crumbs was soft and peppered with red beans...which moved it slightly to the sweeter side of my scale. The only thing that I wasn't quite happy with, was the colour of the crumb...the dark colour of the red bean paste had turned the cake to an awful green. I have to console myself with the saying 'we taste with our mouths and not with our eyes'.


To end this post, I will leave you with the recipe plus a sunshine smile that came with the cake...I hope like me, you'll have a great time baking at home :D


Matcha & Red Bean Butter Cake
Ingredients:
(makes one 20cm cake)

250g cake flour
1 teaspoon baking powder
1/2 teaspoon baking soda
1/2 teaspoon salt
1 tablespoon matcha powder
70g butter, soften at room temperature
150g sugar
2 eggs, lightly beaten
1 cup (250ml) plain, non-fat yogurt
3 tablespoons red bean paste


Method:
  1. Preheat oven at 180 degC. Lightly grease the side of an 8" (20cm) pan with butter and dust it evenly with flour. Tap away any excess flour and line the base with parchment paper.
  2. Sift together cake flour, baking powder, baking soda, green tea powder and salt. Set aside.
  3. With an electric mixer, beat butter for about 1 min. Gradually add in sugar and beat until light and creamy.
  4. Dribble in eggs gradually, about 1 tablespoon at a time, beat constantly for about 2 mins.
  5. With a spatula, fold in 1/3 of the flour mixture. Then, fold in 1/2 of the yogurt, followed by half of the remaining flour mixture. Fold in the remaining yogurt and then the rest of the flour mixture. Stir well after each addition.
  6. Stir in the red bean paste, mix well.
  7. Pour into prepared pan and bake for 35~45 mins or until a skewer inserted into the centre comes out clean.
  8. Remove from oven and let cool in pan for 5 mins. Unmold and cool completely.

Friday 21 November 2008

Otah Buns

I love otah and I love bread.


I wonder why it took me so long to get down to make some otah buns. For those of you who are not familiar with this local savoury snack, otah is made by blending fish paste with a mixture of spices such as chillies, garlic, shallots, turmeric, lemon grass and coconut milk. Morsels of fish paste are then wrapped in coconut leaves and grilled over an open charcoal fire. (Here's a great photo of otahs on a grill and a typical 'mobile' otah stall.) The wonderful aroma of otah sizzling over the grill is unbelievable.


I made the dough by adapting the sweet buns recipe and out of convenience, I used off-the-shelf pre-cooked otah as fillings ;)


I steamed the pre-cooked otah and cut them into slices before wrapping it with the dough. On hind sight, I should have mashed the otah before using it as fillings. The bread turned out great, except that the otah was a tad too dry. It was the first time I tried this brand of pre-cooked otah, it was quite dense and it tasted almost like a chunk of fish cake :( I should have gone back to the usual brand which has got much softer texture and taste much better.


I had fun doodling on one of the photos...I thought the buns looked like little tortoises with their heads sticking out of their shells, ready for a race ;)


Otah Buns

Ingredients:
(make 9 buns)

150g bread flour
150g cake flour
1 teaspoon instant yeast
1/2 teaspoon salt
125g water
1 egg
2 tablespoons caster sugar
50g butter, cut into small cubes

Method:
  1. Place all ingredients except the butter in the pan of the bread machine (according to the sequence as stated in the instruction manual of your bread machine). Select the Dough function of the bread machine and press start. After about 8mins of kneading add in the 50g of butter. Let the machine continue to knead the dough. After the kneading cycle has stopped (20mins), Stop and Restart the machine. Continue to let the machine knead for another 10mins. Leave the lid open while the machine is kneading.
  2. Stop the machine and remove dough from the bread pan. Shape the dough into a smooth round and place in a lightly greased mixing bowl. Cover bowl with cling wrap and let it rise till double in volume for about 60 ~ 90 mins.
  3. Remove dough and give a few light kneading on a lightly floured work surface. Press out the trapped air as your knead. Divide into 9 equal portions (about 60g each) and shape them into rounds. Cover with cling wrap, let the doughs rest for 10mins.
  4. Flatten each dough into a round disc and press out the trapped air. Wrap dough with otah fillings or any fillings as desired.
  5. Place doughs seams side down on a baking tray (lightly greased with oil or butter or lined with parchment paper). Space the dough well apart. Loosely cover with a damp cloth or cling wrap and let doughs proof for 45 ~ 60 mins or until double in size.
  6. Bake at preheated oven at 190 degC for about 15 mins or until the bread is golden brown all over. Remove from pan. Brush with melted butter if desired. Let cool on wire rack.

Sunday 16 November 2008

Banana & Chocolate Muffins

It was a weekday evening. While I was washing the dishes right after dinner, it occurred to me that I have not prepared anything for breakfast for the next day. There were no homemade cakes or bread and I would rather stay at home than to step out of the house to get a loaf of bread from the neighbourhood bakery shop, which is just a stone's throw away. The only way out was to bake something quick and easy. I guess nothing beats a batch of muffins when you are running short of time.


I checked the ingredients I have on hand and managed to match the list with those found in this recipe for a batch of Banana & Chocolate Muffins. The recipe calls for chopped plain chocolates, I replaced them with chocolate chips as I rather save the chocolates for baking a cake or to use it to make chocolate ganache. The recipe calls for self-raising flour, and since I didn't have that, I substituted it with a mixture of plain flour, baking powder and salt.

When I was all set to begin my baking session, my younger child came to the kitchen. When he saw me getting busy with the preparation of the ingredients, as usual, he offered to help me. Unlike his elder brother, he always doesn't seem to mind dropping whatever he was doing, just so he could have some fun playing with flour, butter and eggs. I got him to mash up the bananas while I measured the other ingredients. He found immense pleasure in adding, pouring ingredients into the mixing bowl and eventually stirring them, even if he was only allowed to give a few strokes. Without fail, he asked whether he could do the final mixing of the wet ingredients to the dry ones. Since he was so enthusiastic, I told him he could do all the stirring this time. While he was half way into the mixing, I thought I should capture the moment on video. I got him to pause for a second, while I dashed off to grab my camera.


Here's a very short video clip of him mixing the muffin batter...as the batter got more and more heavy for him to stir, I took over to finish up the job. In case you ask, it was my elder boy who taught me how to use Window's Movie Maker to do the editing of the video clip. Otherwise I wouldn't even know the existence of such a software.

As you can see from the video, I stopped mixing once the flour mixture disappeared into the batter. The batter was very thick and lumpy. To get very soft and fluffy muffins, it is very important not to over stir the mixture...this is especially so for recipes when the instruction calls for mixing the wet ingredients to the dry ones.


Very soon, we were rewarded with ten sweet-smelling, beautifully domed muffins. While the muffins were cooling off, my little one kept asking when he could eat the muffin. He had earlier devoured a banana and a bar of Kit Kat while the muffins were in the oven, and yet he couldn't wait to lay his hands on the muffins. Once I gave the go ahead, he sat down alone at the dinner table and enjoyed the freshly baked muffin he made.

The muffins tasted really delicious when they were fresh out of the oven. The texture was all moist and fluffy. I cut down on the amount of sugar and the sweetness was just right. The photos of the muffins were taken a day after, I think it didn't capture the soft and fluffy crumbs that well. Nevertheless, they tasted as good when served warm. This recipe is going to be a keeper.


Banana & Chocolate Muffins

Ingredients:
(makes 10 ~ 12 muffins)

275g plain flour
3 teaspoons baking powder
1 teaspoon baking soda
1/2 teaspoon salt
3 large bananas, about 450g
100g brown sugar (original recipe calls for 125g brown caster sugar)
1 large egg, lightly beaten
50ml semi-skimmed milk (I used low fat fresh milk)
75g unsalted butter, melted and cooled
50g chocolate chips

Method:
  1. Pre-heat oven to 180degC (350 degF). Line muffin pans with paper muffin cases.
  2. Sieve together flour, baking powder, baking soda and salt into a mixing bowl. Mix in the chocolate chips. Set aside.
  3. Peel the bananas and mash with a fork in a bowl. Add in brown sugar, egg, milk and melted butter. Mix until well combined.
  4. Pour the liquid mixture into the dry ingredients. With a wooden spoon or a spatula, gently fold all the ingredients to form a wet batter. Stir gently, using only a few strokes and mix until the flour are incorporate into the batter. DO NOT Over mix. The batter should appear lumpy.
  5. Spoon batter into paper muffin cases. Bake for 20mins until muffins turn golden brown or a toothpick inserted into the centre comes out clean.
  6. Let cool on a wire rack. Serve warm or cold.
Recipe source: adapted from Good Housekeeping - Easy to Make! Cakes & Bakes.

Saturday 8 November 2008

Lemon Lavender Chiffon Cake

I am trying my best to use up the pack of dried lavender given to me by my cyberfriend vb, before it expires in a couple of months' time. I tried baking a lavender pound cake two weeks ago, but it didn't turn out well. The pound cake was a little dry...I suspect I have over baked it, so I won't be posting that recipe until I give it another attempt.

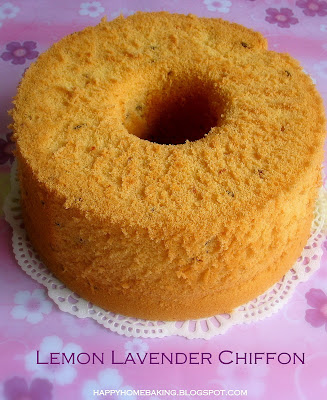
Here's another lavender cake I baked a few days ago, this time it's a lemon lavender chiffon cake.


I love taking pictures of a plain, whole chiffon cake...to me, it is the most photogenic 'model' I have 'worked with'. It looks good even without any frosting or decoration. Somehow, which ever angle I take, the images mostly turn out great. I like how gorgeous the golden crust looks from my view finder...and the hole in the centre, it creates a lot of 'depth' to it...a plain cake without the hole won't look as interesting.


Now, back to the making of this cake. I used a basic chiffon cake recipe and added in 1 teaspoon of dried lavender and some lemon zest. I didn't use too much lavender as I was concerned that the cake would smell like soap ;) Nevertheless, I would probably use up to two teaspoons the next time, as the scent from the lavender was too subtle, or it could be that I have already acquired the taste of lavender in my food :)


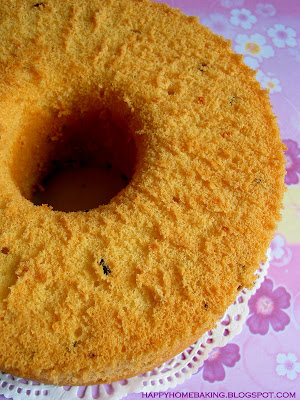
Once again, my oven was not performing well whenever I use it to bake a chiffon cake. Despite turning the knob to 190 degC to pre-heat the oven, it gradually dropped to 170 degC during the first 5~10mins, and then went down to 160 degC, refusing to budge even when i turned the knob up to 200 degC! The recommended temperature is 170 degC and so my cake was baked at 10 deg lower. Although it rose up quite high initially, it started to sink all the way down to the rim of the pan when the baking time was up :(


The cake was very very tender and soft. It was so delicate that I sub-consciously handled it with extra gentleness when slicing it. The texture is not as firm or 'springy' compared with the Earl Grey Chiffon cake I made previously. I much prefer that one, although this lavender version was pretty moist. I hope to try another flavour...green tea with red beans soon.


I have been tagged by CY over at Eat First, Diet Later. It's the '7 random facts about myself' meme. I am not sure whether you will find them interesting, but here's my list:

1. I have a driving license but I don't drive, or rather I CAN'T drive!
2. I write better in English but speak better Mandarin. Sometimes I will think in English but verbalise my thoughts in Mandarin, at other times I will think in Mandarin and write in English...isn't that confusing?!
3. I baked my first batch of brownies 8 years ago with a box of Pillsbury premix.
4. I have over 80 fridge magnets and my fridge is not that big ;')
5. I love to visit the Ikea store, I never leave the place without buying something.
6. The first time I stepped into an aircraft, I was on a flight to KL, Malaysia. I was fresh out from school and it was my first business trip, just a month into my first job. It was a Singapore Airlines flight...I guess I was rather excited during the entire 1 hr flight and yet I pretended to look cool ;)
7. Besides baking, I like to grow plants, although most of the time I ended up killing them. Currently, I have one young chili plant which I have grown from seeds, one sprig of rosemary grown from cuttings I brought all the way from the states, two lime seedlings, three pots of money plants, one aloe vera and two new pots of african violets.

I'm tagging the following 7 bloggers, I hope they have fun with this meme :D

1. Elinluv at Elinluv's Tibits Corner
2. Grace at Kitchen Corner
3. Jane at Passionate About Baking
4. MH at My Home Kitchen
5. Missy at Food Haven for the Obasans
6. Ovenhaven at Epicurean Escapism
7. Yuri at Yuri's Bake Journal

Here are the rules for tagging:
Link to my blog (tagger) on your blog.
Give seven facts about yourself.
Tag another seven bloggers by leaving a comment on their blogs and letting them know they were tagged and listing them (and their blogs) on your blog.


Lemon Lavender Chiffon Cake

Ingredients
(makes one 18cm cake)

Ingredients A:
3 egg yolks
20g caster sugar
60ml water
50ml vegetable oil
70g cake flour
3g baking powder
zest of 1 lemon (not included in the original recipe)
1 teaspoon of dried lavender (not included in the original recipe)

Ingredients B:
3 egg whites
40g caster sugar


Method:
  1. Sieve flour, baking powder together, set aside.
  2. Separate egg yolks/whites and bring to room temperature. (It is easier to separate eggs when they are cold.)
  3. Place egg yolks in a mixing bowl, add in sugar, in 3 separate additions and with a manual whisk, whisk till the mixture becomes very sticky and turn pale. (Test by lifting the whisk, once the batter is able to leave a ribbon-like trail behind, you are done. Another way to gauge: your arm should be very tired by now.)
  4. Drizzle in the water, whisking at the same time till the mixture is well combined. Repeat the same with the oil. Add in the lemon zest, mix well. Sieve over the flour mixture and whisk until flour mixture is fully incorporated into the batter.
  5. In a clean, dry mixing bowl, beat egg whites with an electric mixer until mixture becomes frothy and foamy. Gradually beat in the sugar and beat on high speed until just before stiff peaks form* (after note: after several attempts at baking chiffon cakes, I learned that the whites should be beaten until just before stiff peaks form).
  6. Add the beaten egg white into the egg yolk batter in 3 separate additions, each time folding gently with a spatula until just blended. Fold in the dried lavender.
  7. Pour batter into a 18cm (7 inch) tube pan (do not grease the pan). Tap the pan lightly on a table top to get rid of any trapped air bubbles in the batter.
  8. Bake in pre-heated oven at 170 degC for 35 ~ 40mins or until the cake surface turns golden brown, and a skewer inserted into the centre comes out clean.
  9. Remove from the oven and invert the pan immediately. Let cool completely before unmould. To remove the cake from the pan, run a thin-bladed knife around the inside of the pan and the center core. Release the cake and run the knife along the base of the pan to remove the cake. Dust with icing sugar if desired.
Recipe adapted from: 超爱精巧小甜点

Wednesday 5 November 2008

Multi-grain Loaf

While doing my grocery shopping at the supermarket, I chance upon a shelf packed with different types of premix flour for baking cakes and bread. Out of curiosity, I picked up a pack of mult-grain bread premix and studied the instructions on the back of the package. I was immediately sold by how easy and convenient this bread can be made with a bread machine. All you need to do is to add water, honey, yeast and the pre-mix flour into the bread machine, in 3 hours you can get a fresh loaf of nutritious bread packed with wheat germ and grains such as rye seeds, sunflower seeds, linseed and sesame seeds.

I wasted no time in trying out this premix flour. Instead of using the bread machine to do the work, I decided to make the bread by hand. First of all, it was a great morning, I felt energetic enough to work on my muscles and I always enjoy the therapeutic activity of sinking my fingers into a nice soft dough. I expected the weather to be sunny for the rest of the day, so it would be good to proof the dough under room temperature. Furthermore, without using the bread machine to bake the loaf, I have control over the final shape of the finished loaf.


I used only half the portion as we would have a problem finishing a bigger loaf before the bread turns stale. Contrary to what I have expected, the dough was not as dry as those European breads, such as a pizza dough. It took me longer to knead the dough. For the first 10 minutes or so, the dough was rather sticky, I refrained from adding any extra flour, fearing that it would affect the texture of the finished loaf. A dough scraper is a very handy tool when it comes to scrapping up the sticky mess from the table top. I worked hard on the dough for another 10 more minutes...stretching, folding, make a quarter turn, stretch again, fold again, turn again... repeating the same actions over and over again.

To my relief the dough became smoother and my hands slowly came clean from all those sticky mess. At that stage, the dough was still not fully developed, it was not elastic enough as it tore off easily when I try to pull it apart. I continued to knead the dough, working hard to develop the gluten in the flour, repeating the same actions as above. Once it no longer stuck to my table top, occasionally, I would lift up the dough, give it a flip and slab it hard on the table. It gives me sheer pleasure just to do that...maybe that's the most therapeutic part of kneading a dough, this exercise would certainly help to release any stress and strains in your mind.

After 30 minutes of kneading (the maximum time limit I set for myself for kneading Any bread dough), I was finally satisfied with the result. I left the dough to rise, and walk-through the same bread making rituals of knocking down the dough, shape and let it rest for 10 minutes before shaping it again and left if for the final proof before baking* it in my oven.


I shaped the dough into a longish loaf, and just before baking, I sprinkled some extra wholemeal flour (not included in the premix) on the crust, to give it a rustic appearance.


The bread crumbs were soft and not dense or chewy. I find that it tasted best, lightly toasted, before spreading generously with butter and kaya. Even my kids who hardly eat any whole grain breads didn't whine about it.


Although I am guilty of cooking off-the-shelf, I don't advocate to using any ready mix cake flour (the only exception is Betty Crocky's brownies premix), it is always better to bake from scratch. However, I think it does make sense to me, to use one of these multi-grain bread premix as I don't have to buy different types of grains and seeds separately, and saved the trouble of using them before they turn rancid. The downside of this premix is that there are other undesirable ingredients such as vegetable shortening, emulsifier (wonder what on earth that is?) included. In any case, I do belief as long as we cultivate the habit of eating everything in moderation, once in a while, out of convenience, I would rely on ready mix and off-the shelf food.

(*Note: I baked the loaf at 180 ~ 190 degC for about 25~30mins.)

Afternote: It was only after posting this up that I remembered I have posted a video clip of my younger boy kneading away about a year ago. It brings a smile to my face to watch the clip again...the way he tried to stretch and push the dough, and I love those ten little fingers. I am posting the clip here again if you have not seen it before. Do note that this is NOT a demo on how to go about kneading a dough ;)